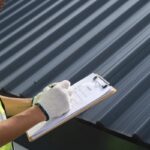
Proper metal roof flashing installation stands as your home’s critical defense against costly water damage and structural problems. When rainwater finds its way through roof joints and seams, it can cause thousands in repairs—yet many homeowners overlook this essential roofing component until leaks appear. Metal roof flashing specifically deserves careful attention because this area remains particularly vulnerable to water intrusion and damage.
What Is Metal Roof Flashing and Why Is It Important?
Metal roof flashing serves as your home’s essential waterproofing system, acting as the critical barrier that prevents moisture infiltration at your roof’s most vulnerable points. This thin piece of material—typically made of aluminum, galvanized steel, copper, or stainless steel—creates a protective shield where roof planes meet vertical surfaces or at penetration points.
Flashing works by directing water away from critical areas of your roof rather than allowing it to seep into joints and seams. Essentially, it creates a smooth path that leverages your roof’s natural slope to channel water toward gutters and downspouts. At intersections and terminations of roofing systems, flashing forms watertight barriers that can be installed in multiple ways:
- As overlapping pieces (like shingles) where one piece laps another
- As sealed continuous surfaces that function as one unified barrier
- With non-continuous profiles specifically designed to prevent water entry via surface tension
Moreover, quality flashing adds years to your metal roof’s lifespan through its corrosion resistance. By preventing water infiltration, it also contributes to better home insulation and improved energy efficiency. If flashing becomes damaged or is installed incorrectly, however, the consequences can be severe. Rather than directing water away from your home, improperly installed flashing might actually channel moisture into the structure. This can lead to wood rot, mould growth, and even deck collapse.
Why Flashing for Metal Roofs Requires Extra Attention
Metal roof flashing is strategically placed at several critical locations:
- Roof valleys – Where two sloping sections meet, creating a channel for concentrated water runoff
- Chimney perimeters – Using continuous “apron” flashing at the base and step flashing at the sides
- Wall intersections – Where roof planes meet vertical walls (using step flashing)
- Around roof penetrations – Including skylights, vents, pipes, and other protrusions
- Roof edges – Using drip edge flashing to direct water into gutters
- Ridge caps – Covering the ridge of your roof
In fact, proper installation at these junctions is so crucial that building codes often mandate specific materials and methods. Without appropriate flashing at these critical points, leaks are virtually guaranteed to occur.
Metal roofs require particular attention to flashing details for several reasons. First, metal expands and contracts with temperature changes more than other roofing materials. Properly designed flashing must accommodate this movement while maintaining watertight seals. Furthermore, material compatibility becomes critically important with metal roofs. Using incompatible metals in contact with each other can trigger galvanic corrosion—a chemical reaction that causes premature flashing failure and roof damage. For example, aluminum flashing should not be used with copper roofing materials.
Additionally, metal roof systems often have distinctive profiles and seaming methods that require specially designed flashing components to maintain waterproof integrity. The flashing must integrate seamlessly with the metal panels, forming perfect seals at all transitions. In essence, metal roof flashing isn’t just an accessory—it’s a fundamental component that determines whether your metal roof will provide decades of trouble-free protection or become a source of ongoing leaks and repairs.
Different Types of Metal Roof Flashing
Understanding the various types of metal roof flashing is crucial for successful installation and long-term protection of your home. Each type serves a specific purpose and requires proper installation techniques to effectively prevent water intrusion.
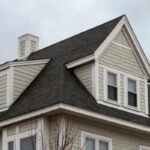
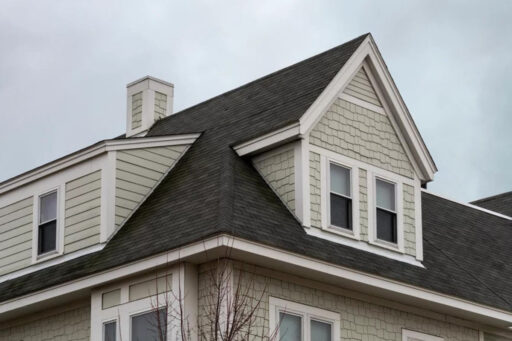
1. Step Flashing: Ideal for Walls and Chimneys
Step flashing consists of L-shaped rectangular metal pieces with a 90-degree bend in the centre, primarily used where roofs meet vertical surfaces like walls and chimneys. These pieces are installed in a “step” pattern, with each piece overlapping the one below it to create a continuous water barrier. The longer leg of the flashing rests against the wall, while the shorter leg overlaps the shingle below.
For proper installation, each piece of step flashing should extend at least 2 inches up the sidewall and overlap the previous piece by at least 2 inches. Importantly, never nail through the sidewall portion of step flashing, as it needs to move with the home’s natural expansion and contraction.
2. Valley Flashing: Critical for Water Channeling
Valley flashing protects the vulnerable areas where two roof slopes meet, forming a valley. This critical component directs concentrated water runoff away from these high-flow areas. Valley flashing typically comes in two styles:
- Open valleys – Feature exposed metal flashing in the centre, providing superior protection against water damage
- Closed valleys – Completely covered by roofing materials for a seamless appearance, though potentially more vulnerable to leaks
Valley flashing often has a W-shaped or V-shaped profile that fits perfectly in roof valleys, guiding water safely down and off the roof surface.
3. Drip Edge Flashing: Protecting Roof Edges
Drip edge flashing consists of thin metal strips installed along the roof’s edge. This seemingly simple component plays a vital role in preventing water from backing up under shingles or damaging fascia boards. Properly installed drip edge flashing allows water to trickle down the roof without causing damage to the house structure.
Available in various materials including aluminum and galvanized steel, drip edge flashing is typically installed under the underlayment at the eaves and over it at the rakes.
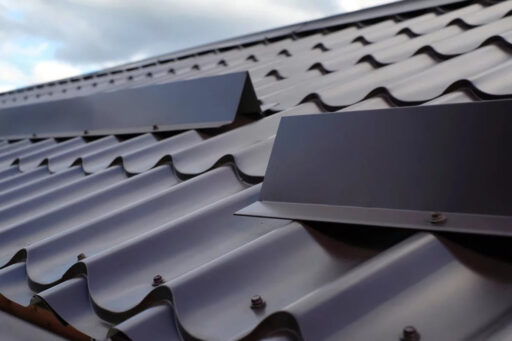
Specialized Flashing for Roof Penetrations
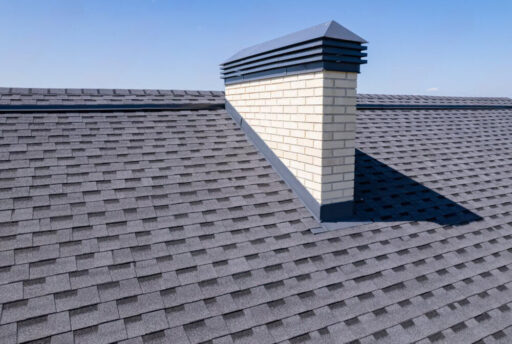
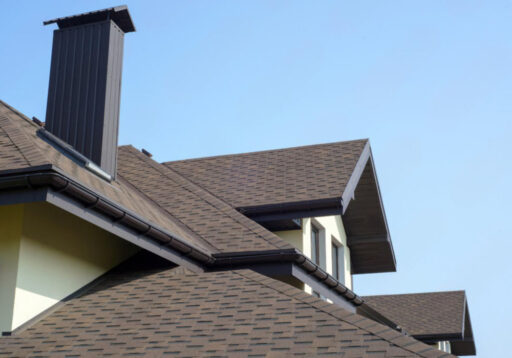
Specialized flashing is crucial for roof penetrations because these areas are prone to leaks and water damage. Among these, metal roof chimney flashing plays a vital role in sealing the joint between the chimney and the roof, preventing moisture from entering your home.
— Chimney Flashing: Multi-Part Protection
Chimney flashing creates a watertight seal between your chimney and roof, typically consisting of multiple components working together. A complete chimney flashing system generally includes:
- Base or apron flashing at the chimney’s bottom edge
- Step flashing along the sides
- Counter flashing that’s embedded into the chimney’s mortar joints
Counter flashing deserves special attention—it’s the visible flashing that extends over the top of the brick and overlaps the step flashing. This two-part system creates redundant protection against water penetration at this especially vulnerable junction.
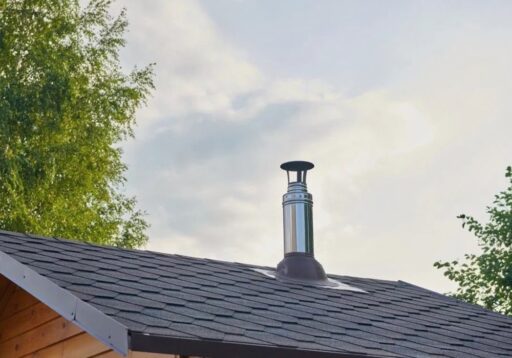
— Vent Pipe Flashing: Sealing Small Penetrations
Vent pipe flashing seals around plumbing vents and other roof penetrations. Quality vent pipe flashing includes a flexible collar that creates a watertight seal around the pipe while allowing for movement. Some high-performance options feature compression collars made from materials like ultra-pure silicone that remain stable in sunlight and are guaranteed weathertight for the life of your roof.
These flashings must be sized correctly for the specific pipe diameter—they’re commonly available for standard Schedule 40 PVC, ABS, and some iron pipes.
— Skylight Flashing: Preventing Leaks at Skylights
Skylight flashing creates a watertight barrier around skylight installations. Many skylight manufacturers offer custom flashing kits designed specifically for their products. For metal roofs, specialized EDM flashing systems feature pieces that interlock with the metal roofing material for faster, more reliable installation.
Quality skylight flashing for metal roofs typically includes pliable, pleated sill aprons that easily form to the roof profile. These systems are engineered to work on metal roofs with pitches between 14° and 85°, providing an additional layer of water protection to prevent leaks.

Maintenance Tips to Prevent Leaks Over Time
Even the most expertly installed metal roof flashing requires ongoing attention to maintain its effectiveness. Regular maintenance not only extends the lifespan of your flashing but also prevents costly water damage to your home’s structure.
1. Inspect Flashing Twice a Year
Establish a consistent inspection schedule for your metal roof flashing—ideally twice yearly in spring and fall. This timing allows you to identify potential issues before hurricane season and assess any damage after summer storms. During these inspections, focus on securing loose metal panels, examining fasteners for proper tension, and verifying that sealants around roof penetrations remain intact.
For a thorough self-inspection, gather basic tools including binoculars, a flashlight, a camera for documentation, and a notebook. Systematically check for loose or missing fasteners, which commonly occur from thermal expansion in hot climates. Examine panel seams for separation or failing sealant, and inspect flashing around chimneys, vents, and skylights—areas where leaks typically begin.
2. Clean Debris and Check for Rust
Debris accumulation against flashing creates moisture traps that accelerate corrosion. Regularly remove leaves, branches, and other materials that collect around flashing points. For cleaning, avoid harsh chemicals—instead, use a mild solution of soapy water combined with lemon juice or vinegar to remove debris and light corrosion.
Routinely inspect for rust spots near flashing, as these indicate potential problems. In coastal areas, rust develops more quickly from salt exposure. Address small rust spots immediately by gently scrubbing with a clean cloth and cleanser, then rinsing thoroughly with a garden hose. Never use wire brushes that could further damage the protective coating.
3. Reapply Sealant When Needed
Metal roof sealants typically last between 10 to 20 years, meaning you won’t need annual reapplication. Nevertheless, periodic inspection remains crucial since failing sealant leads to leaks, potentially causing mould and structural damage. Check for cracking at least every five years and every two to three years thereafter.
Key areas requiring consistent sealant attention include seams, fasteners, pipe boots, vent flashings, and gutter connections. When reapplying, first remove old caulk completely, then apply a fresh layer. For chimney flashing, ensure the counter flashing embedded in mortar joints maintains its integrity.
When to Call a Professional
Certain conditions warrant immediate professional assistance. Contact a licensed roofing company immediately upon noticing water stains on ceilings, damp attic insulation, or visible dripping. Likewise, seek expert help for widespread rust development, multiple leaks, or significant panel displacement.
Safety considerations should guide your maintenance approach—never attempt inspection on steep roofs. Furthermore, structural concerns like sagging areas or excessive oil-canning on panels require professional assessment. As your roof approaches 15–20 years of age, increasing the frequency of professional inspections becomes prudent.
Summary
Metal roof flashing stands as your home’s primary defense against water intrusion at vulnerable roof points. Properly installed flashing prevents thousands in potential water damage repairs while significantly extending your roof’s lifespan. Material selection deserves careful consideration based on your specific needs. Successful flashing installation depends on meticulous attention to detail. Clean surfaces, precise measurements, quality sealants, and proper overlapping techniques ensure watertight barriers at all critical junctions. These seemingly small details ultimately determine whether your flashing effectively channels water away from vulnerable areas or allows moisture to penetrate your home’s structure.