Proper attic ventilation is essential for maintaining a healthy and energy-efficient home in Vancouver’s humid climate. Installing a roof vent can significantly improve air circulation, reduce moisture build-up, and regulate attic temperature. This guide will walk you through how to install a roof vent, tailored specifically for Vancouver homeowners.
The Importance of Attic Ventilation in Vancouver
Vancouver’s unique climate, characterized by mild temperatures and high precipitation, makes attic ventilation crucial. Inadequate ventilation can lead to serious issues like mould growth, wood rot, and reduced roof lifespan. While specific data for Vancouver is limited, general studies indicate that proper attic ventilation can lower cooling costs by up to 15% and extend roof life significantly.
It’s essential to maintain a balance between air intake and exhaust for optimal attic ventilation. While roof vents are crucial for exhausting stale air, soffit vents or gable vents are necessary for fresh air intake. Ensure your attic has adequate ventilation on both ends to prevent moisture buildup.
Tools and Materials
- Roof vent (static, turbine, or powered)
- Reciprocating saw or jigsaw
- Roofing nails
- Hammer or nail gun
- Roofing cement
- Caulking gun
- Utility knife
- Chalk line
- Tape measure
- Safety harness and roof brackets
- Ladder
- Work gloves and safety glasses
How to Install a Roof Vent Steps
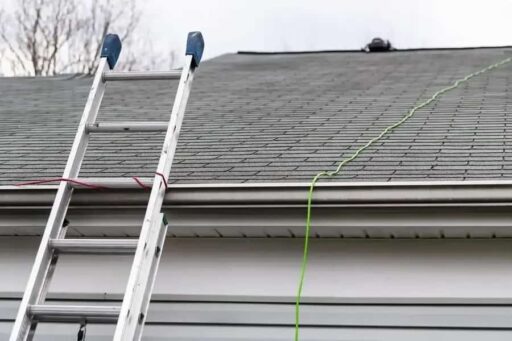
1. Safety First: Before beginning any work on your roof, prioritize safety. Use a safety harness and secure it to a sturdy anchor point. Install roof brackets for a stable work platform, which is especially important on Vancouver’s often wet and slippery roofs.
2. Choose the Right Location: Select a spot near the roof peak, about 45-60 cm below the ridge. This placement allows for optimal air circulation. Avoid installing vents near chimneys or plumbing stacks.
3. Mark the Cutting Area: Use a chalk line to mark the vent outline. Most roof vents require a 35 cm by 35 cm opening, but always check the manufacturer’s specifications.
4. Cut the Opening: Carefully cut along the chalk lines using a reciprocating saw or jigsaw. Take care not to damage underlying structures or wiring.
5. Prepare the Roof Surface: Clean the area around the opening, removing debris or loose shingles. Apply roofing cement around the opening’s perimeter for a watertight seal.
6. Install the Vent: Slide the upper edge of the vent under the shingles above the opening. The lower edge should overlap the shingles below. Secure the vent using roofing nails.
7. Seal and Waterproof: Apply roofing cement around the vent edges and over nail heads. Use a caulking gun to apply additional sealant where the vent meets the roof surface.
7. Replace Shingles: Replace any removed or damaged shingles, using roofing cement to secure the edges and ensure a proper seal.
Types of Roof Vents
| Vent Type | Pros | Cons | Average Cost (CAD) |
| Static Vents | Low cost, no moving parts | Less effective in low-wind areas | $20 – $80 per unit |
| Turbine Vents | Wind-powered, more effective | Can be noisy, may leak if not installed properly | $50 – $150 each |
| Powered Vents | Highly effective, especially in still air | Higher cost, requires electricity | $200 – $500 per unit |
| Ridge Vents | Uniform ventilation, aesthetically pleasing | Higher installation cost | $7 – $10 per linear foot |
Maintenance and Long-Term Care
Regular maintenance is crucial in Vancouver’s damp climate. The city’s average annual rainfall of about 1,189 mm (46.8 inches) makes roof care particularly important. Inspect your vents annually, ideally in late summer before the rainy season begins in earnest. Here’s a more detailed maintenance routine:
- Visual Inspection: Look for signs of damage, such as cracks, dents, or loose components. Check for proper alignment and secure attachment to the roof.
- Debris Removal: Clear away leaves, twigs, and other debris that may have accumulated around or inside the vents. This is especially important in Vancouver, where abundant vegetation and strong winds can lead to significant debris buildup.
- Animal Intrusion: Look for signs of animal nesting or damage. Vancouver’s urban wildlife, including raccoons and squirrels, may attempt to make homes in or around roof vents.
- Seal Integrity: Check the sealant around the vent’s base and edges. Vancouver’s frequent rain can deteriorate sealants more quickly than in drier climates.
- Shingle Condition: Examine the shingles surrounding the vent for any damage or wear that could lead to leaks.
- Interior Check: From inside the attic, look for any signs of water staining or daylight coming through around the vent, which could indicate a leak.
- Functionality Test: For powered or turbine vents, ensure they’re operating smoothly and quietly.
Professional Installation and Maintenance Services
While DIY installation and maintenance are possible for some homeowners, many Vancouverites prefer to rely on professional services for optimal results and peace of mind. Knowing how to install a roof vent is crucial, but professional expertise can ensure the best outcome.
Our services include:
- Professional Vent Installation: Our experienced team can install all types of roof vents, ensuring proper placement, secure attachment, and effective waterproofing.
- Ventilation System Design: We assess your home’s specific needs and design a ventilation system that optimizes airflow and moisture control.
- Regular Maintenance: Our maintenance services include thorough inspections, cleaning, and necessary repairs to keep your roof ventilation system in top condition.
- Upgrades and Replacements: We can upgrade your existing ventilation system or replace old, inefficient vents with modern, more effective models.
- Emergency Repairs: In case of storm damage or other urgent issues, we offer prompt repair services to prevent water damage to your home.
- Energy Efficiency Consultation: Our experts can advise on how to maximize your home’s energy efficiency through proper attic ventilation.
Choose professional installation and maintenance to optimize your roof ventilation system for Vancouver’s climate, increasing its effectiveness and longevity. Professional service will also identify and address other roofing issues before they become major problems.
Energy Savings and Return on Investment
While specific data for Vancouver is limited, studies suggest that proper attic ventilation can reduce cooling costs by 10-12%. Considering the average cost of installing a basic static vent system is $400-$800 CAD, the return on investment can be realized within 2-4 years through energy savings alone. Additionally, improved indoor air quality and extended roof life provide long-term benefits.
Final Thoughts
Installing a roof vent offers Vancouver homeowners a valuable home improvement solution, addressing the city’s unique moisture challenges and enhancing energy efficiency. Follow this guide and adhere to safety precautions to successfully install a roof vent and enjoy improved attic ventilation. Consult a local roofer if you’re uncomfortable working on your roof or lack the necessary experience.