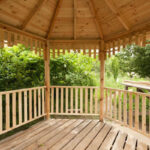
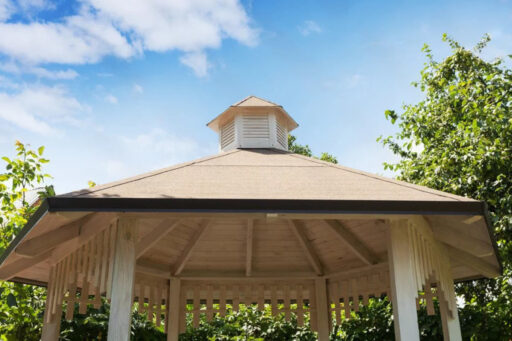
Cedar shake roof installation transforms an ordinary gazebo into a striking backyard centrepiece while providing exceptional durability against the elements. The natural wood tones and textured appearance create a rustic yet sophisticated look that complements any outdoor space. Learning how to install cedar shingles on a gazebo might seem challenging at first. However, with the right tools, materials, and techniques, this project is entirely manageable for motivated DIYers. Additionally, the investment pays off through both increased property value and decades of protection when properly maintained.
Gathering the Right Tools and Materials
Successful cedar shake roof installation begins with selecting appropriate materials and tools. Unlike other roofing projects, cedar requires specific considerations to ensure durability and proper aesthetics.
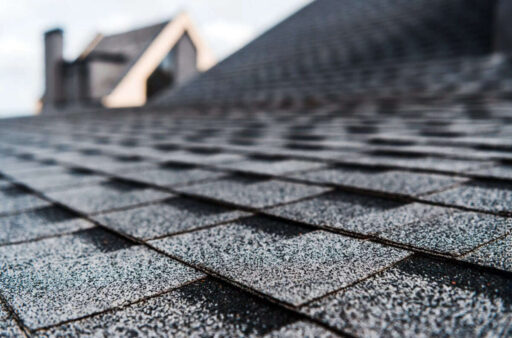
Cedar shakes vs. shingles
Cedar shakes are hand-split with rugged texture, while shingles are machine-cut with smooth, uniform appearance. Shakes are thicker, offering better insulation and lasting up to 40 years versus 30 for shingles. Shingles lay flat for easier installation; shakes need to felt paper between courses for weather protection.
Required tools include:
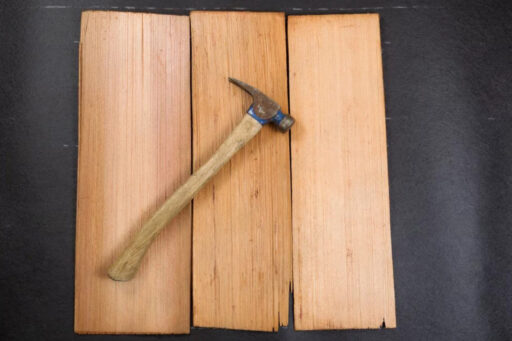
- Roofing hammer or pneumatic nailer
- Utility knife with sharp blades
- Tape measure and chalk line
- Ladder and safety harness
- Staple gun for underlayment
- Protective gear
Many professionals prefer pneumatic nail guns, but adjust air pressure properly—too much can split the cedar shakes. Proper tools and underlayment are critical when you want to know how to install cedar shingles on a gazebo correctly.
Underlayment
Use No. 30 ASTM D226 Type II or No. 30 ASTM D4869 Type IV felt underlayment for moisture protection. For areas within 15 miles of saltwater, consider additional barriers. Synthetic underlayment offers superior durability, weather resistance, and comes in longer rolls for efficient installation.
Fasteners
Each shake needs only two nails. Use 316 stainless steel nails near saltwater or with fire-retardant shakes. Otherwise, 304 stainless steel or hot-dipped galvanized nails work well.
Requirements:
- Head minimum 7/32″ diameter
- Length allowing 3/4″ penetration into deck
- Ring shank with blunt tips prevent splitting
Wider No. 1 grade shakes require fewer nails than No. 2 material due to greater width.
Preparing the Gazebo Roof for Installation
Proper preparation ensures a durable, watertight cedar shake roof system.
Remove old roofing and inspect structure
Strip existing materials starting from the highest point downward. Remove all underlayment and nails. Inspect exposed wood for rot, water damage, warped boards, loose fasteners, and proper joint support. Replace any damaged boards immediately for a solid foundation.
Install roof deck boards
Create a proper base using either:
- Solid sheathing – 5/8″ exterior-grade plywood or OSB
- Spaced sheathing – 1×4 pressure-treated boards with 1/8″ spacing
Many professionals recommend solid sheathing for cedar shakes, especially with preservative or fire-treated materials. Secure all boards to rafters with exterior-grade fasteners.
Apply drip edge and membrane
Install drip edge flashing around roof perimeter before underlayment. This diverts precipitation, prevents water infiltration, protects fascia, and seals pest entry points. Roll out roofing felt or breathable membrane across the entire surface, overlapping rows by 4 inches toward the ridge.
Add battens for ventilation
Ventilation is essential for cedar shake longevity. Install vertical counter battens from eave to ridge, creating air gaps between underlayment and shakes. Add horizontal battens as nailing surfaces. With vapour-permeable underlayment, counter battening becomes crucial for proper airflow, extending shake lifespan and preventing moisture buildup, warping, and splitting.
Installing Cedar Shake Shingles Step-by-Step
The installation phase requires precision and attention to detail. With proper preparation complete, begin installing the cedar shakes.
Start with a double-layer starter course
Begin with starter pieces measuring approximately 16″ x 14″. Position these to project 2″ beyond the fascia board at the eave and 1½” at the gable end. Space each starter piece about ½” apart. After completing the starter row, install a second course directly on top, offsetting joints between layers by at least 1½”. This double-coursing creates deeper shadow lines and enhanced weather protection. Following these steps is the first key when learning how to install cedar shingles on a gazebo.
Snap chalk lines for even rows
Snap chalk lines to guide installation and ensure straight courses. Nail shingles at each roof end and stretch string between as reference. Measure to ridge line every 6 feet, maintaining parallel courses. To avoid narrow peak courses, adjust exposure of final 5–6 courses for equal width.
Maintain proper spacing and stagger joints
Leave 10-16mm gaps between shakes for expansion and contraction, preventing moisture buckling. Offset joints from previous course by at least 38mm. No joints should align in three consecutive courses. This staggered pattern prevents water infiltration and creates appealing aesthetics.
Nail placement and sealing techniques
Correct fastening is crucial to your roof’s longevity. For each shake:
- Use exactly two nails per shake, even for wider pieces
- Position nails approximately 19mm from each edge
- Place nails about 38mm above the exposure line
- Ensure nail heads sit flush with the shake surface, never overdriven
Cutting shakes for hips, valleys, and edges
Mark and cut hip shingles to fit tightly against field shingles above. Cedar cuts easily with a square and sharp knife. Use tin snips for thinner sections. When installing valley flashing, extend it at least 10″ on each side of the valley centreline for roof slopes 4:12 or greater, or 14″ per side for gentler slopes.
Finishing the Roof with Ridge Caps and Details
The final phase involves ridge caps and finishing details to protect roof intersections and create a polished appearance.
Install hip shingles before ridge shingles. Start at the end receiving the least wind—typically east for east-west orientations or south for north-south. This prevents wind from lifting shingles. Separate pre-formed pieces at perforations. Create starter shingle by removing exposure portion. Position at bottom of each hip, fastening with one nail per side, 1 inch from edge. Continue upward, overlapping each piece and maintaining alignment with chalk lines.
Pre-formed cedar ridge caps offer convenience and uniformity. Custom caps can be created from matching roof shingles by cutting with bevelled edges to match roof pitch. This ensures perfect colour matching but requires precise cutting skills. Consider pre-fabricating custom caps in workshop by ripping to width first, then adding bevel cuts.
Exposed nail heads create potential leak points. The final ridge cap typically leaves exposed nails that must be sealed. Apply roofing cement over exposed fasteners and along ridge cap joints. Allow cement to cure 48 hours before weather exposure.
Trim excessive eave overhang—first row should project approximately 1½ inches beyond edge. Remove debris with thorough roof sweep. Inspect entire installation for missed nail heads or gaps requiring additional sealant.
Maintaining Your Cedar Shake Roof
Proper maintenance extends your cedar shake gazebo roof to 50+ years instead of requiring major repairs within 15–20 years.
- Annual inspections and replacing damaged shakes
Inspect roof twice yearly in spring and fall. Look for cracked, split, or curled shakes that break the protective seal. Replace entire damaged shakes rather than patching—thin ends tear around nails. Position replacements to overlap shingles below by at least 1½ inches. - Apply sealant every 2–3 years
Apply waterproof sealant every 2–3 years in dry climates, annually in humid regions. Quality sealants protect against moisture while preserving natural beauty. Consider UV protection products to prevent premature graying. - Clear debris and check flashings
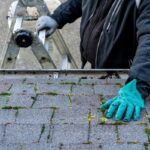
Remove leaves and debris monthly using a roof brush—never high-pressure wash, which dislodges shingles. Focus on crevices where debris accumulates, as wet material shortens cedar lifespan. Inspect flashing around roof penetrations and recaulk as needed.
Summary
Cedar shake roofs transform ordinary gazebos into stunning backyard features while providing exceptional durability and weather protection. Remember that proper preparation serves as the foundation for a successful installation. Your gazebo structure must be thoroughly inspected and prepared before any cedar shakes are applied. Additionally, choosing the right tools and materials—particularly stainless steel nails and appropriate underlayment—significantly impacts your roof’s longevity. For optimal results, it is often best to hire a professional contractor to handle the installation.