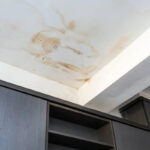
When it comes to maintaining the integrity of your home, a reliable roof is paramount. In Vancouver, where the weather can be unpredictable, homeowners often find themselves facing the challenge of roof leaks and damage. Whether it’s due to heavy rain, snow, or storm damage, knowing how to effectively patch your roof temporarily can save you from costly repairs down the line. This article will explore various temporary roof patch options available for Vancouver homes, ensuring you have the knowledge to protect your property until a permanent solution can be implemented.
Emergency Roof Repair Basics
Before diving into specific patching methods, it’s essential to understand the basics of emergency roof repair. Roof structures are designed to protect your home from the elements, but they can be vulnerable to leaks from various sources. Common leak sources include:
- Flashing: This is the material used to seal joints and prevent water from entering.
- Underlayment: A protective layer beneath the roofing material that can deteriorate over time.
- Decking: The structural base of the roof that can be compromised if water penetrates.
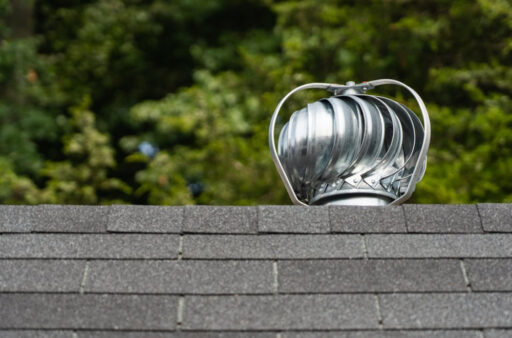
- Ventilation: Proper airflow is crucial to prevent moisture buildup in the attic, which can lead to leaks.
Identifying the source of a leak is the first step in applying a temporary roof patch. Once you know where the water is entering, you can choose the appropriate materials and methods to seal it up.
Environment & Weather Challenges in Vancouver
Vancouver’s climate presents unique challenges for homeowners, particularly when it comes to roof maintenance. The city is known for its heavy rainfall, especially during the autumn and winter months, which can exacerbate existing roof vulnerabilities. Understanding these weather patterns is vital in choosing appropriate temporary roof patch options.
Regular seasonal roof maintenance is also essential in Vancouver’s wet climate. Rain is not the only concern; Vancouver also experiences occasional snow and strong winds. These elements can lead to physical damage such as loose shingles, cracks, and leaks. The fluctuating temperatures can cause materials to expand and contract, further stressing the roof structure. Recognizing these environmental stressors is crucial for selecting a patching solution that can withstand such conditions until permanent repairs are feasible.
When considering temporary roof patches, it is important to select materials and methods that are resilient against moisture and provide adequate protection during harsh weather conditions. This approach ensures that your home remains safe and dry, despite the unpredictable Vancouver weather.
Common Temporary Roof Patch Materials & How They Work
When it comes to temporary roof patches, several materials can be used effectively. Here’s a breakdown of some of the most common options:
- Roofing Cement: This is a versatile material that can be used to seal small leaks and cracks. It adheres well to various roofing materials and provides a waterproof barrier.
- Sealant: Roof sealants come in various forms, including liquid and tape. They are designed to fill gaps and prevent water from seeping through.
- Flashing Tape: This self-adhesive tape is ideal for sealing joints and seams. It’s easy to apply and can provide a strong, waterproof seal.
- Roof Tarps: A heavy-duty tarp can be used to cover large areas of damage temporarily. It’s essential to secure the tarp properly to prevent it from blowing away in the wind.
- Caulking: For smaller leaks, caulking can be an effective solution. It’s easy to apply and can seal gaps around vents and flashing.
- Metal Patch: For more significant damage, a metal patch can be used to cover holes or missing shingles. It’s durable and can withstand harsh weather conditions.
- Plywood Cover: In cases of extensive damage, a plywood cover can provide a temporary solution until a professional repair can be made.
- EPDM Membrane: This rubber membrane is excellent for flat roofs and can be used to create a waterproof barrier over damaged areas.
- Duct Tape: While not a long-term solution, duct tape can be a quick fix for small leaks until more permanent repairs can be made.
- Emergency Repair Kits: These kits often contain a variety of materials, including tarps, sealants, and flashing tape, making them a convenient option for homeowners.
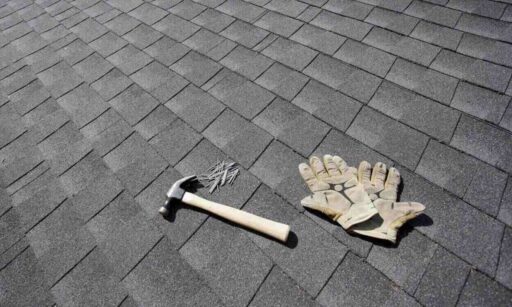
Applying Temporary Patches: Best Practices for Safety and Durability
When applying a temporary roof patch, safety should be your top priority. Working on a roof involves risks, especially in wet, windy, or icy conditions. Always ensure that you have the necessary safety equipment, such as a harness connected to a stable anchor point, non-slip shoes, sturdy ladder, work gloves, and safety glasses. If possible, work with a spotter or assistant to hold the ladder and hand you tools. Keep tools and materials organized to prevent tripping, and avoid working near power lines. If the conditions are too dangerous, it’s best to wait until they improve or call a professional.
Before applying any patch, clean the affected area thoroughly. Remove any debris, dirt, or loose materials to ensure the patch adheres properly. For roofing tape or cement, apply pressure evenly to eliminate air bubbles and ensure a tight seal. This will not only improve the effectiveness of the patch but also extend its lifespan.
It’s also crucial to monitor the patch regularly. Although these solutions are temporary, they should last until you can arrange a permanent repair. Check the patch after heavy rain or windstorms to ensure it hasn’t shifted or deteriorated. Regular evaluations, supported by insights from roof repair vs. replacement, help determine when a full repair is necessary.
Temporary Patch Options for Different Roof Types
Different roofing materials require specific patching techniques. Here’s how to approach temporary patches for the most common roof types in Vancouver:
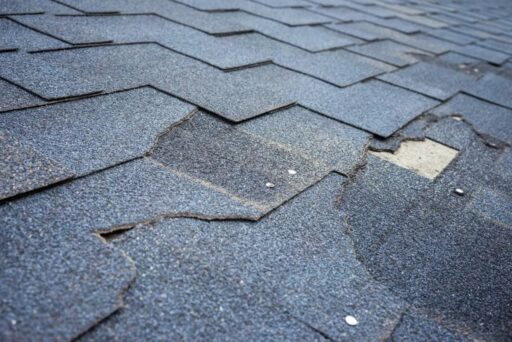
Asphalt Shingles
Asphalt shingles are a popular choice for many Vancouver homes due to their affordability and durability. However, they are vulnerable to high winds, heavy rain, and UV exposure.
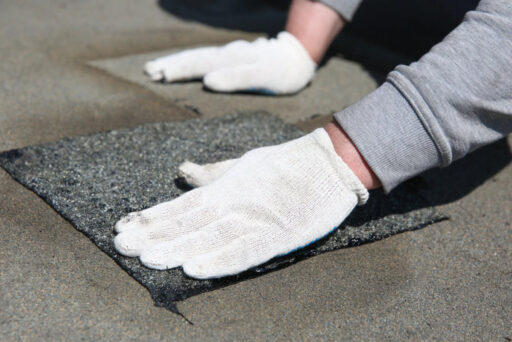
Technique:
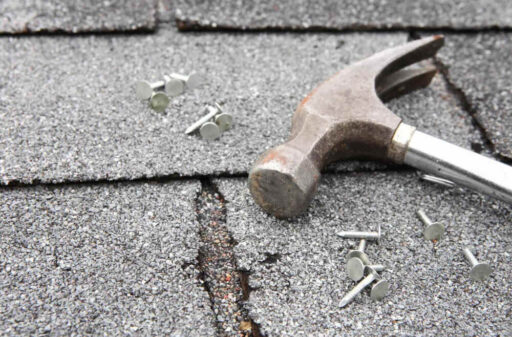
- Gently lift the damaged shingle using a flat pry bar.
- Apply roofing cement underneath and press it back into place.
- For missing shingles, slide a new one into position and secure it with roofing nails and cement over the nail heads.
- Small cracks or holes can be sealed with roof sealant or flashing tape, ensuring full coverage beyond the damaged area.
Tips: Work on a dry day if possible – moisture can prevent adhesion. Press firmly to avoid air bubbles, and always overlap the patch slightly beyond the crack to ensure waterproofing.
Metal Roof
Metal roofs are highly durable but prone to leaks around screws, seams, and flashing joints.
Technique:
- Clean the affected area thoroughly with a wire brush and remove all rust and debris.
- Use a metal patch kit or butyl-based roofing tape over the damaged section.
- For holes, cut a small metal sheet slightly larger than the leak, apply roofing cement or urethane sealant, and press the patch into place.
- Smooth the edges and seal the perimeter to prevent water intrusion.
Tips: Avoid using asphalt-based sealants – they can corrode metal over time. Always dry the area completely before patching for the best adhesion.
Flat Roof (Torch-on, EPDM, TPO)
Flat roofs, common in commercial and modern residential buildings, require flexible materials to handle ponding water and temperature changes.
Technique:
- For EPDM or TPO roofs, use a compatible rubber patch kit. Cut the patch 2-3 inches larger than the damaged area.
- Clean with isopropyl alcohol, apply primer, then the patch, and roll it firmly to eliminate bubbles.
- For torch-on roofs, apply a cold-applied roofing sealant or self-adhesive flashing for small leaks.
- In severe cases, use a tarp secured with sandbags or wood battens until permanent repairs can be made.
Tips: Avoid open flames or torches unless you’re a trained professional. Flat roofs are slippery when wet, so wear non-slip shoes and secure footing.
Cedar Roof
Cedar roofs add a natural aesthetic but are prone to rot, moss, and warping when exposed to prolonged moisture.
Technique:
- Inspect for split or curled shingles. Lift the damaged one with a pry bar and slide a replacement cedar shingle underneath.
- Secure it with galvanized nails and seal with wood-compatible roof sealant.
- For small punctures or leaks, apply clear exterior-grade caulking or flexible roof sealant designed for wood.
Tips: Trim nearby trees to reduce shade and moisture retention. Apply a moss remover or gentle cleaning solution before patching to improve adhesion and prevent regrowth.
Short-Term Fixes vs. Permanent Repairs
Temporary roof patches can stop a leak in its tracks, but they don’t replace a proper repair. Once the patch is in place, call in a professional roofer to inspect the damage and identify the underlying issues. Even a small leak can soak into decking, insulation, and structural components, causing rot and long-term problems if left unchecked.
Taking action with a permanent repair protects your home and your wallet. By fixing the source of the leak, you prevent repeated water intrusion, extend the life of your roof, and avoid costly repairs down the road. Don’t let a quick patch become a long-term headache – act now, repair properly, and keep your Vancouver home dry and secure.
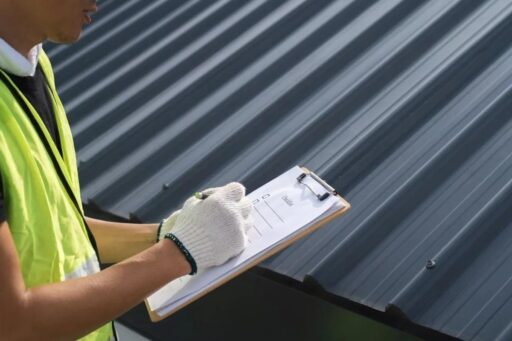
When to Schedule a Professional Roofing Inspection
While temporary patches are useful for minor issues, some situations require the expertise of a professional roofer. If you notice persistent leaks, significant structural damage, or if your temporary patch fails, it’s time to call in a professional. They have the necessary skills and equipment to assess and repair your roof safely and effectively.
Additionally, if you’re uncomfortable working at heights or lack the necessary safety equipment, it’s best to leave the job to a professional. Roofers are trained to handle these situations and can provide a more permanent solution to your roofing problems.
Finally, if your roof is nearing the end of its lifespan, consider a professional inspection. They can provide insights into whether a full replacement is necessary or if targeted repairs will suffice. This proactive approach can save you time and money in the long run and ensure your home’s safety and integrity.
Protect Now, Repair Properly Later
In conclusion, temporary roof patches are essential for protecting your home from water damage until permanent repairs can be made. By understanding the various patching options available and following best practices for application, you can safeguard your property against the elements. Remember, while temporary fixes can provide immediate relief, it’s crucial to address underlying issues with professional help to ensure the long-term integrity of your roof. Stay proactive, and your home will remain safe and dry for years to come