Dreaming of a sleek, durable roof that turns heads and weathers storms? Metal roofing might be your knight in shining armour. Not only does it boast a lifespan exceeding 40-70 years, but it’s also fire-resistant, energy-efficient, and low-maintenance. Although homeowners can install a new roof themselves, it is an expensive and challenging task. This guide provides a detailed overview of the process, outlining the complexities and costs involved. If you still wish to proceed, we will walk you through the 13 steps of installation, offer safety advice, suggest necessary materials, and share professional tips. However, be prepared for a demanding and costly endeavor. Let’s dive into the details and see what it takes to undertake this project.
Before You Begin: Planning and Preparation
1. Know Your Roof
The first step in learning how to install metal roofing is to get intimate with your roof’s measurements, pitch, and structure. Sketch a detailed diagram, including the length, width, slope, and location of hips, valleys, and eaves. Knowing your roof’s square footage will help you determine the amount of metal panels, underlayment, and fasteners needed.
2. Check Local Codes and Permits
Building codes vary by region. Contact your local building department to understand any permits required for metal roof installation. They may also have specific guidelines for materials and installation methods.
3. Choosing Your Metal Panels
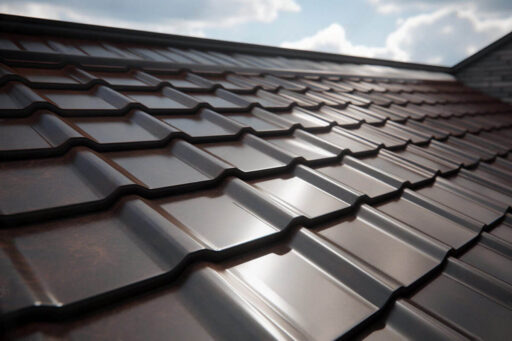
Metal roofing comes in a variety of styles (standing seam, panels, shingles), materials (steel, aluminum, zinc), and thicknesses. Consider factors like your budget, desired aesthetics, snow load requirements, and local climate. Steel is the most affordable option, while aluminum offers superior corrosion resistance.
4. Gather Your Tools and Materials
Here’s a basic checklist to get you started:
- Safety Gear: Sturdy work boots, gloves, safety glasses, fall protection harness.
- Power Tools: Metal shears, drill/driver, metal nibbler (optional).
- Roofing Supplies: Metal panels, underlayment (ice and water barrier for low-slope roofs), drip edge, ridge cap, fasteners, sealant.
- Miscellaneous: Tape measure, chalk line, level, utility knife.

Safety First!
Metal roofing installations involve working at heights and handling sharp materials. Prioritize safety by using proper fall protection equipment, wearing sturdy footwear and gloves, and always maintaining a three-point contact system while navigating the roof.
Step-by-Step Guide on How To Install Metal Roofing
Part 1: Roof Preparation
5. Remove the Old Roof (if applicable)
If you’re replacing an existing roof, carefully remove the shingles or other roofing material. Ensure proper disposal according to local regulations.
6. Inspect the Roof Sheathing
Ensure the roof sheathing (the wooden boards under the roofing material) is structurally sound and free of rot, moisture damage, or warping. Replace any damaged sections.
7. Install Ice and Water Barrier (optional)
For low-slope roofs (less than 2:12 pitch), installing an ice and water barrier is crucial to prevent water infiltration behind the metal panels. Overlap the barrier at seams and secure it with staples.
Part 2: Installing the Metal Panels
8. Install Drip Edge
The drip edge protects the fascia board (the exposed edge of the roof) from water damage. Start at the eaves and fasten the drip edge securely using appropriate fasteners.
9. Start at the Eaves
Metal roofing panels are typically installed horizontally, starting from the eaves (the lowest edge) and working your way up.
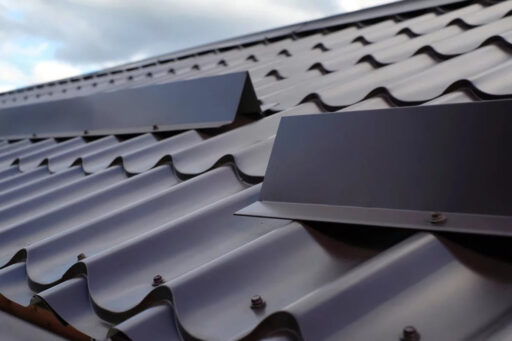
10. Panel Installation
Carefully lift each panel onto the roof. Ensure proper overlap (usually 1-2 inches) with the previous panel following the manufacturer’s instructions. Use temporary clips to hold the panels in place.
11. Fastening the Panels
Drive specialized metal roof fasteners through the designated areas on the panels, ensuring proper penetration into the roof sheathing. Don’t overtighten, as this can cause warping. Refer to the manufacturer’s recommendations for fastener spacing.
Part 3: Trimming and Finishing Touches
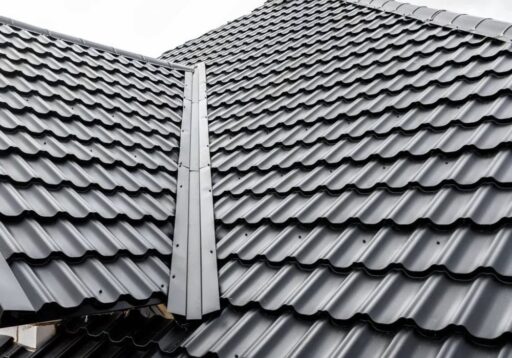
12. Ridge Cap Installation
The ridge cap covers the peak of the roof and provides a finished look. Slide the ridge cap sections together, ensuring proper overlap, and secure them with fasteners.
13. Flashings and Valleys
Metal flashing is used around roof penetrations (pipes, vents) and valleys to prevent water infiltration. Install these meticulously following the manufacturer’s instructions and seal any gaps with sealant.
Pro Tips for a Flawless Metal Roof Installation
- Measure Twice, Cut Once: Metal panels are often expensive. Double-check your measurements before cutting to avoid costly mistakes.
- Stagger Panel Seams: For a more aesthetically pleasing look, avoid aligning seams directly above each other in subsequent rows. Stagger them by at least one panel.
- Use Snips, Not Saws: Metal shears or snips are ideal for cutting metal panels. Avoid using power saws, which can generate excessive heat and damage the material’s protective coating.
- Seal Everything: Use a high-quality sealant around all seams, penetrations, and flashing points to ensure a watertight roof.
- Clean Up as You Go: Metal shavings can be sharp and pose a safety hazard. Regularly clean up debris to maintain a safe work environment.
Maintaining Your Metal Roof for Long-Term Beauty
Metal roofs require minimal maintenance, but a few simple steps can extend their lifespan and appearance:
- Annual Inspections
Once a year, visually inspect your roof for any signs of damage, loose fasteners, or debris accumulation. Here in Canada, it’s especially important to check for any ice damming issues in the winter. - Clear Debris
Remove leaves, branches, and any other debris that might collect on the roof, especially around valleys and eaves. Heavy snowfalls can also add significant weight to your roof, so be sure to remove excess snow after major storms. - Wash Gently
Every few years, you can gently wash your metal roof with mild soap and water to remove dirt and grime. Avoid using harsh chemicals or abrasive cleaners.
Summary
Installing a metal roof yourself can be a challenging but ultimately rewarding experience. By following these steps, planning meticulously, and prioritizing safety, you can transform your home with a durable, attractive, and long-lasting roof. Remember, if at any point you feel overwhelmed or unsure of your skills, don’t hesitate to consult a professional roofing contractor.